 |
| Petaluma, The City of Industry |
Sunday, February 26, 2012
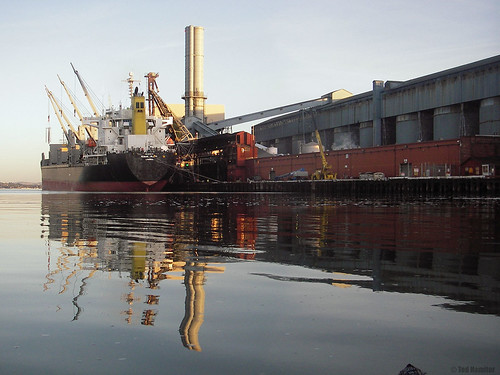
On the Petaluma River
Mark Twain, Jack London, John Steinbeck--none of them wrote about the Petaluma River, but only because they hadn't gotten around to it.

Sunday, January 29, 2012
Modified Yakima roof rack
I wanted to keep the kayak from sliding on the roof rack, and I wanted to make it easier to tie down two kayaks--if I ever had a chance to do that--so I tried a modified bar on my Yakima rack.
All of the wood is either fir or pine, some of which was already hanging around, and a couple of pieces from the cull bin at Home Depot. The horizontal pad is pipe insulation glued on with Goop; I don't expect this to last a long time, since the insulation isn't all that tough and the Goop-to-wood adhesion doesn't seem to be very good. The vertical pad--not really a pad, but a high-friction surface to make the kayak stay put--in the middle is rubber from an inner tube, glued on with Titebond II.
The two clips to the right of the vertical part are PVC conduit brackets, cut and then melted slightly with a heat gun, that ought to be able to clamp a one-piece paddle to the rack.
The thing on the left side is removable. It was meant to be a load stop, and to provide a place to wrap the lashing straps. I haven't used it yet, since I haven't come up with a convenient way to lock it onto the load bar.
 |
| The roof rack modified for the kayak. |
The two clips to the right of the vertical part are PVC conduit brackets, cut and then melted slightly with a heat gun, that ought to be able to clamp a one-piece paddle to the rack.
The thing on the left side is removable. It was meant to be a load stop, and to provide a place to wrap the lashing straps. I haven't used it yet, since I haven't come up with a convenient way to lock it onto the load bar.
Saturday, January 28, 2012
Political Science: John Calvin and Thomas Hobbes
John Calvin and Thomas Hobbes, by `spacecoyote at deviant ART. There seems to be a lot of Calvin and Hobbes fan art at deviantArt, some done in anime and manga styles, some with Calvin as a teenager, some of popular scenes done in the artist's own style, I think there are some with Lovecraft tie-ins, and so on.


Homemade hatch cover for the Looksha Sport LV
The kayak has a hatch aft of the cockpit, but there was no hatch cover, and I couldn't find a replacement.
The first hatch cover was made from an exercise ball that I bought at Urban Ore to make into a flotation bag. It has a skinny inner tube glued into the rim of the cover; the tube was cut to a bit more than the circumference of the hatch, one end was glued shut, and the other end has an NRS air valve. (The valve is glued into a piece of vinyl tubing, which is jammed onto a PVC hose barb, which is glued to the end of the inner tube.)
The idea is that when the inner tube is inflated the cover tightens around the hatch rim and seals it. It seems to work, but the tube has a slow leak and the cover becomes loose after a few minutes.
I made a second cover from part of an air mattress that I had cut up to make a flotation bag.
It has another inner tube glued into it, and this time I checked the tube carefully for leaks first. It still needs a valve (the white thing on the tube is a hose clamp that doesn't work too well), and the edges have been left untrimmed to make it easier to wrap a bungee cord around it as a temporary fix.
(Update, October 2012: The hatch cover I've been using the last few months is a sheet of 1/4" marine plywood shaped to the hatch and covered with a rubbery plastic material that's held on with a a loop of elastic cord around the outside. This has an 8" plastic deck plate in the middle, which makes it easy to get stuff out of the hatch from the cockpit without removing the whole cover.

This setup is heavy [and kind of ugly] and I'm thinking of making a fiberglass cover to replace the plywood, and adding a fiberglass rim to it to secure the rubbery material, which is difficult to glue to anything.)
(Later update: a fiberglass cover would have been fairly easy to do, maybe with part of a refrigerator door gasket, or a car door gasket, to make it somewhat water tight. I don't really like working with epoxy and fiberglass, so I might try a neoprene cover made the same way as a neoprene spray skirt. I can document and post it here if I think there's any interest.)
 |
| Hatch cover number one. |
 |
| The inside of cover #1. |
The idea is that when the inner tube is inflated the cover tightens around the hatch rim and seals it. It seems to work, but the tube has a slow leak and the cover becomes loose after a few minutes.
I made a second cover from part of an air mattress that I had cut up to make a flotation bag.
 |
| The second cover on the hatch. |
 |
| The inside, with a temporary coroplast insert. |
(Update, October 2012: The hatch cover I've been using the last few months is a sheet of 1/4" marine plywood shaped to the hatch and covered with a rubbery plastic material that's held on with a a loop of elastic cord around the outside. This has an 8" plastic deck plate in the middle, which makes it easy to get stuff out of the hatch from the cockpit without removing the whole cover.

This setup is heavy [and kind of ugly] and I'm thinking of making a fiberglass cover to replace the plywood, and adding a fiberglass rim to it to secure the rubbery material, which is difficult to glue to anything.)
(Later update: a fiberglass cover would have been fairly easy to do, maybe with part of a refrigerator door gasket, or a car door gasket, to make it somewhat water tight. I don't really like working with epoxy and fiberglass, so I might try a neoprene cover made the same way as a neoprene spray skirt. I can document and post it here if I think there's any interest.)
Friday, January 27, 2012
Recent kayak gear DIY projects
Here's a bilge pump, made from about $2 worth of salvaged materials. The main shaft is made from 1-½" PVC or ABS pipe--I'm not sure which it is--and the other parts are standard PVC fittings.
The inlet valve for the pump is made from a 1 ½" PVC slip-to-threaded adapter from the junk box, a piece of a mountain bike inner tube, plastic mesh (from a craft store), and a plastic retainer thingy from the top of a juice bottle.
The parts are glued together with Goop, and the assembly seems to work. I might replace the inner tube rubber with some thin neoprene.
The plunger is a ½"-diameter acrylic rod that had been hanging around in the junk box for a long time. The inside end of the rod is attached with a screw to a plastic disc with holes in it, and a rubber washer from the hardware store on top makes it a valve. It works, but it seems to me that it needs to be more robust--a fiberglass or phenolic or brass or aluminum (etc.) rod would be less likely to break, and less affected by moisture; the disc ought to be thicker, and more securely attached to the plunger.
Another project is the hand paddle, which will (so rumor says) allow me to to take a photo and maneuver the kayak at the same time--that is, I won't have to try and handle the full-size paddle and the camera both at once.
I bought a couple of "smashball" paddles from Urban Ore (from which all blessings flow) for $1 apiece, and I cut one down to what seemed like the right size for a hand paddle. The edges were sanded down and coated with some epoxy that I wanted to use up before it went completely bad (and which, two days later, is hard but still tacky). The plastic grips were pulled off and replaced with a tight-fitting length of old inner tube, which was glued down at either end with Goop.
The super-cheap emergency paddle is a thin plywood paddle-ball paddle that might work as a hand paddle for a while: it probably won't stand up to any hard paddling, but might be sufficient for maneuvering. If it isn't good for either one then I'll be out of 10¢, but I think I can cope.
I began making a sorta-new roof rack and a couple of hatch covers for the Necky Looksha LV kayak that I obtained a few weeks ago...
I'll save those for another post.
Updates: the ABS body of the pump turned out to be not quite round, and so the plunger assembly tended to stick. I've never got around to finding a different pump body.
The plies on the Nashba paddle's handle began to come apart after months of usage, probably because I hadn't sealed the wood first and it tended to stay wet under the inner-tube part. I'll try gluing the plies back down with Titebond III or epoxy and sealing with epoxy or something.
 |
| The pump body, made from 1.5" pipe and fittings. |
 |
| The bilge pump inlet valve. |
 |
| The inlet valve before assembly. |
 |
| The plunger and the plunger valve. |
Another project is the hand paddle, which will (so rumor says) allow me to to take a photo and maneuver the kayak at the same time--that is, I won't have to try and handle the full-size paddle and the camera both at once.
 |
| The nashba hand paddle. |
 | ||
| A smashball paddle from the junk store. |
 | ||
| The super-cheapskate emergency paddle. |
I began making a sorta-new roof rack and a couple of hatch covers for the Necky Looksha LV kayak that I obtained a few weeks ago...
I'll save those for another post.
Updates: the ABS body of the pump turned out to be not quite round, and so the plunger assembly tended to stick. I've never got around to finding a different pump body.
The plies on the Nashba paddle's handle began to come apart after months of usage, probably because I hadn't sealed the wood first and it tended to stay wet under the inner-tube part. I'll try gluing the plies back down with Titebond III or epoxy and sealing with epoxy or something.
Thursday, November 17, 2011
Flying fish apocalipse
If you haven't seen one of the Asian jumping carp videos yet, take a look at this--the fish that makes ecological disaster fun!
Posted on youtube by dorlandtgroup at http://youtu.be/F37GA8I3gBQ.
I don't know where this was shot. There are lots of jumping carp videos, from different parts of the Mississippi River basin, none from the Great Lakes--yet. The fish is the silver carp, which has been introduced to and is well-established in the Mississippi and is working its way north. These aren't small fish; according to the Wikipedia entry, silver carp "can grow to over 40 lb (18 kg), and can leap 10 ft (3 m) in the air. Many boaters traveling in uncovered high-speed watercraft have been injured by running into the fish while at speed."
I can't stop watching these videos: they show dozens or hundreds of fish jumping, and people in open motorboats being pelted with fish. I've seen one with a little kid standing in shallow water, surrounded by tiny jumping fish, and one with kids on water skis, in carp-hunting costumes, trying to hit fish with swords. There are a couple of videos in which the guy holding the camera can't stop laughing, and in some the scene jolts once in a while as the cameraman is hit by a fish.
And, of course, the silver carp has a terrible effect on the environment. I suppose the videos won't seem as funny if the fish ever get to the Sacramento River.
Posted on youtube by dorlandtgroup at http://youtu.be/F37GA8I3gBQ.
I don't know where this was shot. There are lots of jumping carp videos, from different parts of the Mississippi River basin, none from the Great Lakes--yet. The fish is the silver carp, which has been introduced to and is well-established in the Mississippi and is working its way north. These aren't small fish; according to the Wikipedia entry, silver carp "can grow to over 40 lb (18 kg), and can leap 10 ft (3 m) in the air. Many boaters traveling in uncovered high-speed watercraft have been injured by running into the fish while at speed."
I can't stop watching these videos: they show dozens or hundreds of fish jumping, and people in open motorboats being pelted with fish. I've seen one with a little kid standing in shallow water, surrounded by tiny jumping fish, and one with kids on water skis, in carp-hunting costumes, trying to hit fish with swords. There are a couple of videos in which the guy holding the camera can't stop laughing, and in some the scene jolts once in a while as the cameraman is hit by a fish.
And, of course, the silver carp has a terrible effect on the environment. I suppose the videos won't seem as funny if the fish ever get to the Sacramento River.
PVC camera stand part 2
The stand is designed to use parts that are already available at home. Using more or fewer of the commonly available PVC fittings from the hardware store, the design could be made simpler or more complex, and there are probably hundreds of variations on this design that will work. And with extra parts, I could add a paddle rest, for instance, or a cup holder, or a small water cannon (connected to the bilge pump), or a soap bubble generator, or a beer dispenser (since the white PVC is food-safe), or some kind of Rube-Goldberg contraption that's completely impractical but looks cool.
The two tees in the center\right in the photo and the pipe that joins them aren't going to be glued. The tees have to be able to rotate to adjust the camera's position. I expect to be able to remember to check the stand when I adjust it to make sure the upright tee is sufficiently tight. The parts could be joined internally or externally (with elastic cord, thick string, whatever) to make sure it all doesn't come apart at some inappropriate time.
The stand in the above photo has a glued crosspiece to keep the two halves from separating. The end caps (on the left side) are there because using caps was easier than gluing foam into the ends of the fittings. A pair of right-angle elbow fittings would have worked better, but I didn't have any extras to use.
The right-angle elbow fittings on the aft end of the stand (near the cockpit) are there to raise it enough that the lower center tee isn't resting on the lengthwise ridge on my kayak's deck, which would keep the thing from being level.
The plug has been improved slightly: a wide, small diameter rubber band (from a bunch of broccoli) is wrapped around the lip on the outside end of the plug (it probably should be glued on), which makes it a lot easier to grip with wet hands. Something like the cap of an aspirin bottle, or some other plastic disk with knurled edges, glued onto the end might serve the same purpose.
On the adapter, the nylon screw is pushed thru a tight-fitting rubber bumper, which provides a good grip for putting the screw into the camera. A wing nut secured with a regular nut would also work. There's a nylon washer between the bumper and the bushing so the screw can be turned without turning the adapter. The inside of the bushing is filled with neoprene and sealed with RTV to keep water out, and there's a nut on the screw to keep it from sliding out of the adapter.
On top of the bushing is a rubber gasket that I found in my toolbox--it provides a much better grip on the bushing. There's a rubber washer at the end, which fits tightly over the end of the screw so that it won't fall off when I'm not looking.
The adapter works pretty well: there's enough friction to keep camera from twisting on the adapter when it's help sideways, but not so much that the camera can't easily be turned by hand. The bumper makes it easy to take the adapter on or off the camera with wet hands, and the rubber gasket makes it easier to get out of the tee.
The stand worked pretty well on it's trial run. I made some changes to the plug and adapter (as above), and I'll probably leave it at that.
I'm going to upload a few trial (and low-quality) videos to youtube, like this one:
From http://www.youtube.com/watch?v=DLjYMbWFl9U.
The two tees in the center\right in the photo and the pipe that joins them aren't going to be glued. The tees have to be able to rotate to adjust the camera's position. I expect to be able to remember to check the stand when I adjust it to make sure the upright tee is sufficiently tight. The parts could be joined internally or externally (with elastic cord, thick string, whatever) to make sure it all doesn't come apart at some inappropriate time.
 |
| The latest stand with the invisible camera tilted up. |
The right-angle elbow fittings on the aft end of the stand (near the cockpit) are there to raise it enough that the lower center tee isn't resting on the lengthwise ridge on my kayak's deck, which would keep the thing from being level.
 |
| The stand on the kayak. |
The plug has been improved slightly: a wide, small diameter rubber band (from a bunch of broccoli) is wrapped around the lip on the outside end of the plug (it probably should be glued on), which makes it a lot easier to grip with wet hands. Something like the cap of an aspirin bottle, or some other plastic disk with knurled edges, glued onto the end might serve the same purpose.
On the adapter, the nylon screw is pushed thru a tight-fitting rubber bumper, which provides a good grip for putting the screw into the camera. A wing nut secured with a regular nut would also work. There's a nylon washer between the bumper and the bushing so the screw can be turned without turning the adapter. The inside of the bushing is filled with neoprene and sealed with RTV to keep water out, and there's a nut on the screw to keep it from sliding out of the adapter.
 |
| The plug and the adapter. |
 |
| The camera-to-stand adapter, and the tee plug. |
The stand worked pretty well on it's trial run. I made some changes to the plug and adapter (as above), and I'll probably leave it at that.
 |
| A still shot with the Optio WP on the camera stand. |
From http://www.youtube.com/watch?v=DLjYMbWFl9U.
Subscribe to:
Posts (Atom)
